Knowledge Base Article
How to Offer Meal Choices at an Event
Meal Choices lets the people registering for your event pick what they would like to eat, and gives you the totals to hand to your caterer.
Open Meal Choices
Open the event and click Meal Choices in the Participants/Guests group of the workspace menu.
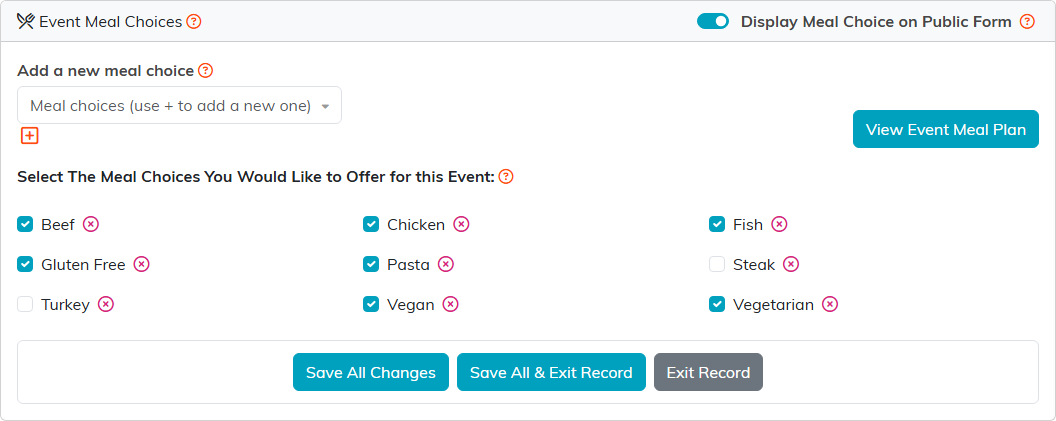
Seven meals offered for a lunch of 200.
Show meal choices on the public form
Switch on Display Meal Choice on Public Form. The person registering picks a meal, and so does every guest they add. The switch saves as soon as you flip it.
Choose the meals for this event
- Tick each meal you are serving under Select The Meal Choices You Would Like to Offer for this Event.
- Click Save All Changes. Ticking a box does not save on its own.
What you tick is exactly what people see on the form, and the first meal comes preselected. If nothing is ticked, the form has nothing to offer and the picker stays hidden even with the switch on.
Add a new meal
To add a meal your organization has never offered, use the orange plus under Add a new meal choice. It appears as a checkbox right away; tick it and save to offer it here. Adding meals is limited to administrators and master builders.
The meal list is shared by every event. The pink icon beside a meal removes it from that shared list for all events, and Argenta will not remove a meal any event or guest is already using.
See the totals
Click View Event Meal Plan. It opens the meal planning report for this event, with a total for each meal and every guest's choice listed below. Export To CSV and Export To PDF give you a copy for the caterer.
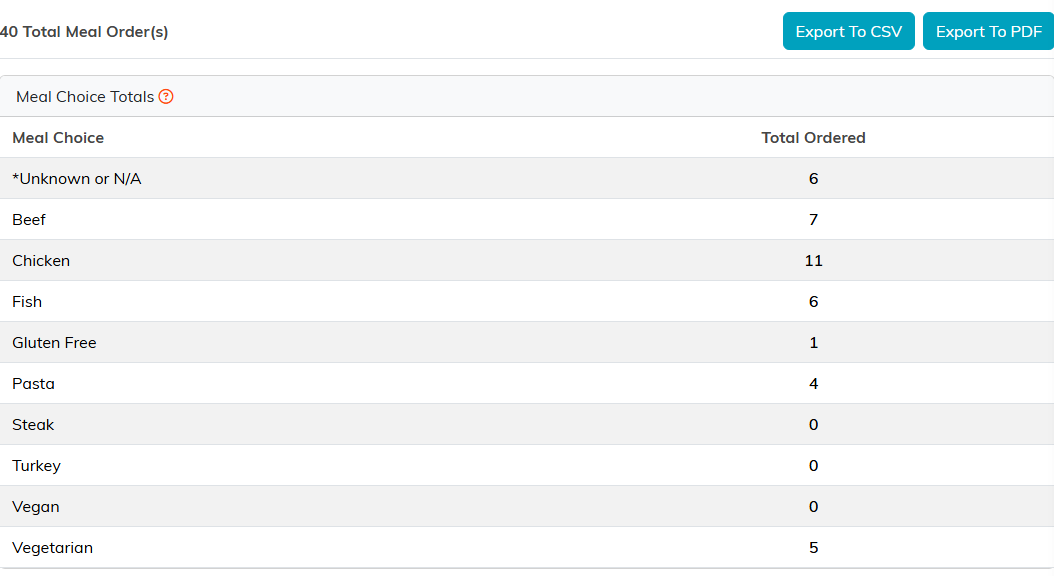
The numbers your caterer asks for, a few weeks out.
A guest's meal can be changed on their own record, under Guest's Meal Choice. For a map of the whole event workspace, see Overview Part 1 of the Argenta Event Management System.